Building your own amazing slip ‘n slide: a Step-by-Step Guide
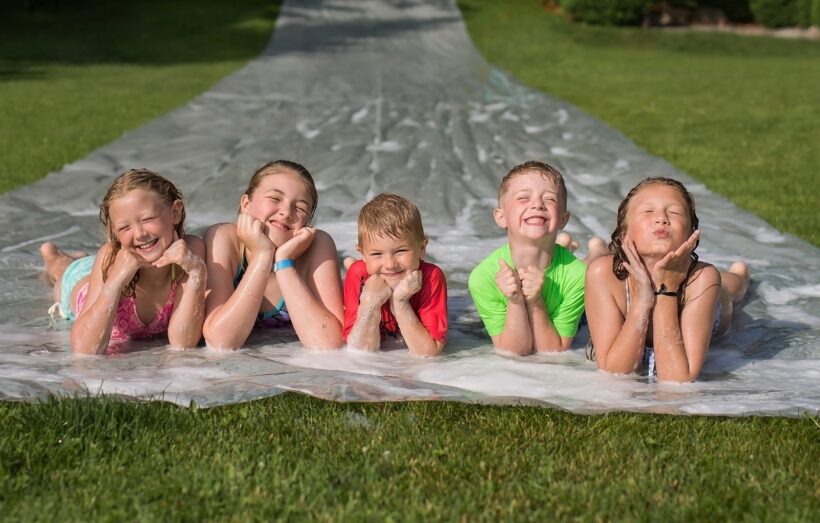
Welcome to summertime! During this season, it’s an enjoyable moment to do exciting outdoor activities with your family and friends. One of our favorites is definitely the water slip ‘n slide party. Let’s set up a cool DIY water slide together!
What do we need for a DIY Slip N Slide?
Instead of buying a ready-made water slide from the toy store, why not create your very own slide? It is easy-to-do, as well as being a much cheaper alternative. Moreover, you can easily find all the needed materials at any home improvement store.
Before going out, here’s a list of things you will need:
- A heavy-duty plastic sheet that is suitable for your backyard’s size. We recommend buying a good quality one so it will last longer. For a medium-sized garden, the price of a plastic sheet should be around 75$.
- Water softener salt bags
- Baby soap
- Sprinklers
Step-by-step guide on how to set up a homemade Slip ‘n Slide
Setting up a homemade water slip ‘n slide is an occasion to spend time with your family. When it is done, both adults and children will be able to enjoy this giant water slide in the backyard and have a happy moment together. Below are a step-by-step guide and techniques on how to successfully build one:
Step 1: Choose a location and roll out the plastic sheet
First, survey your backyard and choose the best location for your slip ‘n slide. If there is a downward slope, it will be perfect! After that, clear all rocks, garbage, and any debris that could ruin the plastic or hurt someone by accident.
Make sure your backyard is all cleaned up. Then, roll out the plastic sheet on a flat surface. You may fold the sheet in half, lengthwise, to make double layers if you need it.
Step 2: Fix the plastic sheet in place
On many websites or DIY videos, it is advised to fix the plastic sheet in place by staking it into the ground with metal or plastic posts. It seems like a good idea at first, but in reality, those poles might not hold the plastic into the ground as much as one would think. Furthermore, if these peaked poles come out during your activities, they might harm someone.
For a better solution, we recommend putting water softener salt bags on the top of the plastic and fold them over so they are immovable. That way, it will be much safer than using anchor pins or any other hazardous materials. Besides, you can always reuse these bags later, which is quite convenient.
Step 3: Settle and turn on sprinklers, it’s time to get wet!
It goes without saying, everyone loves playing with water to cool off on a hot summer day. Therefore, you need a good water supply for your giant slip ‘n slide. Generally speaking, for one slide you will need 2 sprinklers: one at the top of the slide and another in the middle. By setting the sprinklers like this, the water will flow smoothly through the slide. Now, we are ready for a water war!
Step 4: Secret tip – Add baby soap for extreme slipperiness.
The more the slide is slippery, the more fun you’ll have! Indeed, you don’t want to just get stuck halfway through the slide because your slide… doesn’t slide enough! You can easily solve this problem by pouring buckets of water mixed with baby soap. The latter will help reduce friction as well as improve your landing speed. And most importantly, baby soap is safe for your kid’s eyes and skin. Thus, you can let your kids have fun without having any worries.
Step 5: Add accessories for more fun. (optional)
Last but not least, we have an option to maximize your playtime. If simply sliding down and climbing up, again and again, seems a bit boring, we might have the solution for you. It’s time to add some fun accessories to the mix! By sitting on a giant donut tube, for example, you can go a little faster and pass over the bumps in the yard like it’s nothing. Also, you can share the moment with your kid by placing him or her in front of you so you can slide down together.
Cautions and safety tips: how to play slip ‘n slides without danger.
As sliding down from a slippery slope can become quite extreme, our homemade slip ‘n slides could be dangerous, especially if parents aren’t looking at the wrong time.
To avoid any injuries, we want to share some safety tips with you before letting your kids jump in the slide:
- Always keep your eyes on children while playing on the slip ‘n slide in order to prevent them from doing risky things.
- Make sure the surrounding area is safe, especially at the front and at the end of the slide to avoid a sudden crash.
- Do not wear eyeglasses, jewelry, nor any shoes.
- Avoid using the slip ‘n slide during inclement weather.
- Sliding headfirst is forbidden because it is extremely dangerous. It is advised to slide down with a sitting position.
- Do not run on/around the slide.
- After you’re done playing with the slide, you should clean the backyard and store your slip ‘n slide in a safe place. Try to hide it somewhere so your kids won’t play with it while you’re gone.
You see, making a DIY slip and slide is not difficult at all. Once it is settled, you will be proud of yourself. Moreover, it can provide you and your family a lot of fun as well as an impressive summer experience. So, embrace summer and have a blast!

No Comments